For the bird photo we used the heal tools. The spot healing brush tool which erases a piece of the picture which you select. We also used the healing brush tool which select a part of the picture you want them you can mirror that same part of the picture some were else in the picture.
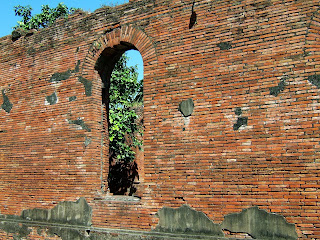
For this brick work picture we used the patch tool. The patch tool allows you to select a picture, dragged that part of the picture, and mirror another part of it allowing you to cover up the part you have selected so it blends in with everything else.

For this photo shop picture all I have simply done is add another layer on top of one.
For this picture I got a picture of the Hulk then added added broken glass onto another layer and blended them in together. This is giving the effect that the Hulk is smashing the glass on the screen.
Some of the quick tools I used for this are:
Control and T to select and re size the photo.
Holding down shift to keep the picture blurred when re sizing it.
The Crop button.
In this section I have a few images where I used basic photo shop tools. Ranging from the lasso tall, which is a free hand tool where you draw around an image or shape and it crops and allows you to move it. To the brush tool to draw around the outline of an image to give it that bolder effect.
In this first picture I made a rough copy of a fitness magazine. This image includes a ripped version of Albert Einstein. All I simply did in this photo was crop and re-size some of the images to fit them on the front of the cover to make it look vaguely look like the begging of a front cover of a magazine.
In this photo of Sully all I was simply doing here was testing out the drawing aspect on a bamboo tablet. I used the paint brush tool, zoomed in and highlighted the edges of him to give him the bold effect.
In this "very comedic" picture of Alan Sugar I cropped Alan Sugars head re - sized it and then duplicated it. Simple as that.


No comments:
Post a Comment